OSXNT Tutorial
Follow these steps to get started with OSXNT.
1
Download OSXNT
Choose the version you need:
- OneFile executable (single .exe file) - Download EXE
- OneDir package (folder with all dependencies) - Download ZIP
After download, extract if needed and place the files in a convenient location, e.g., C:\tools\osxnt.
2
Set Path (Optional)
To run OSXNT from any command prompt, add its directory to your system PATH:
# Temporary for current session
set PATH=%PATH%;C:\tools\osxnt

# Permanent (Windows)
# Open System Properties -> Environment Variables -> Add new PATH entry
Alternatively, you can always navigate to the folder where OSXNT is located.
3
Verify Installation
Open a command prompt (CMD) and run:
osxnt --versionYou should see output similar to:
OSXNT Version: 2.4.0
Author: alzzdevmaret
...
For more detailed verification, see the Verification page.
4
Basic Commands
Try these simple commands to get started:
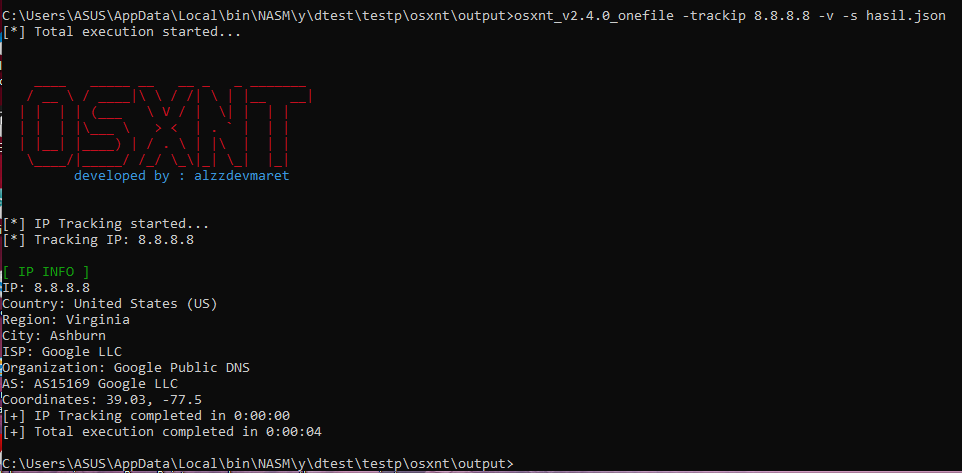
# Track your own IP
osxnt ip myip

# Scan a website
osxnt web example.com

# List available wordlists
osxnt -wordlist --list
For a complete list of commands, check the Documentation.